ShopDreamUp AI ArtDreamUp
Deviation Actions


Description
this is more of the strange urge to do step by step things. >_> I've a couple more I'm planning, but who knows. Those'll have to wait until my Secret Santa drawing is done.
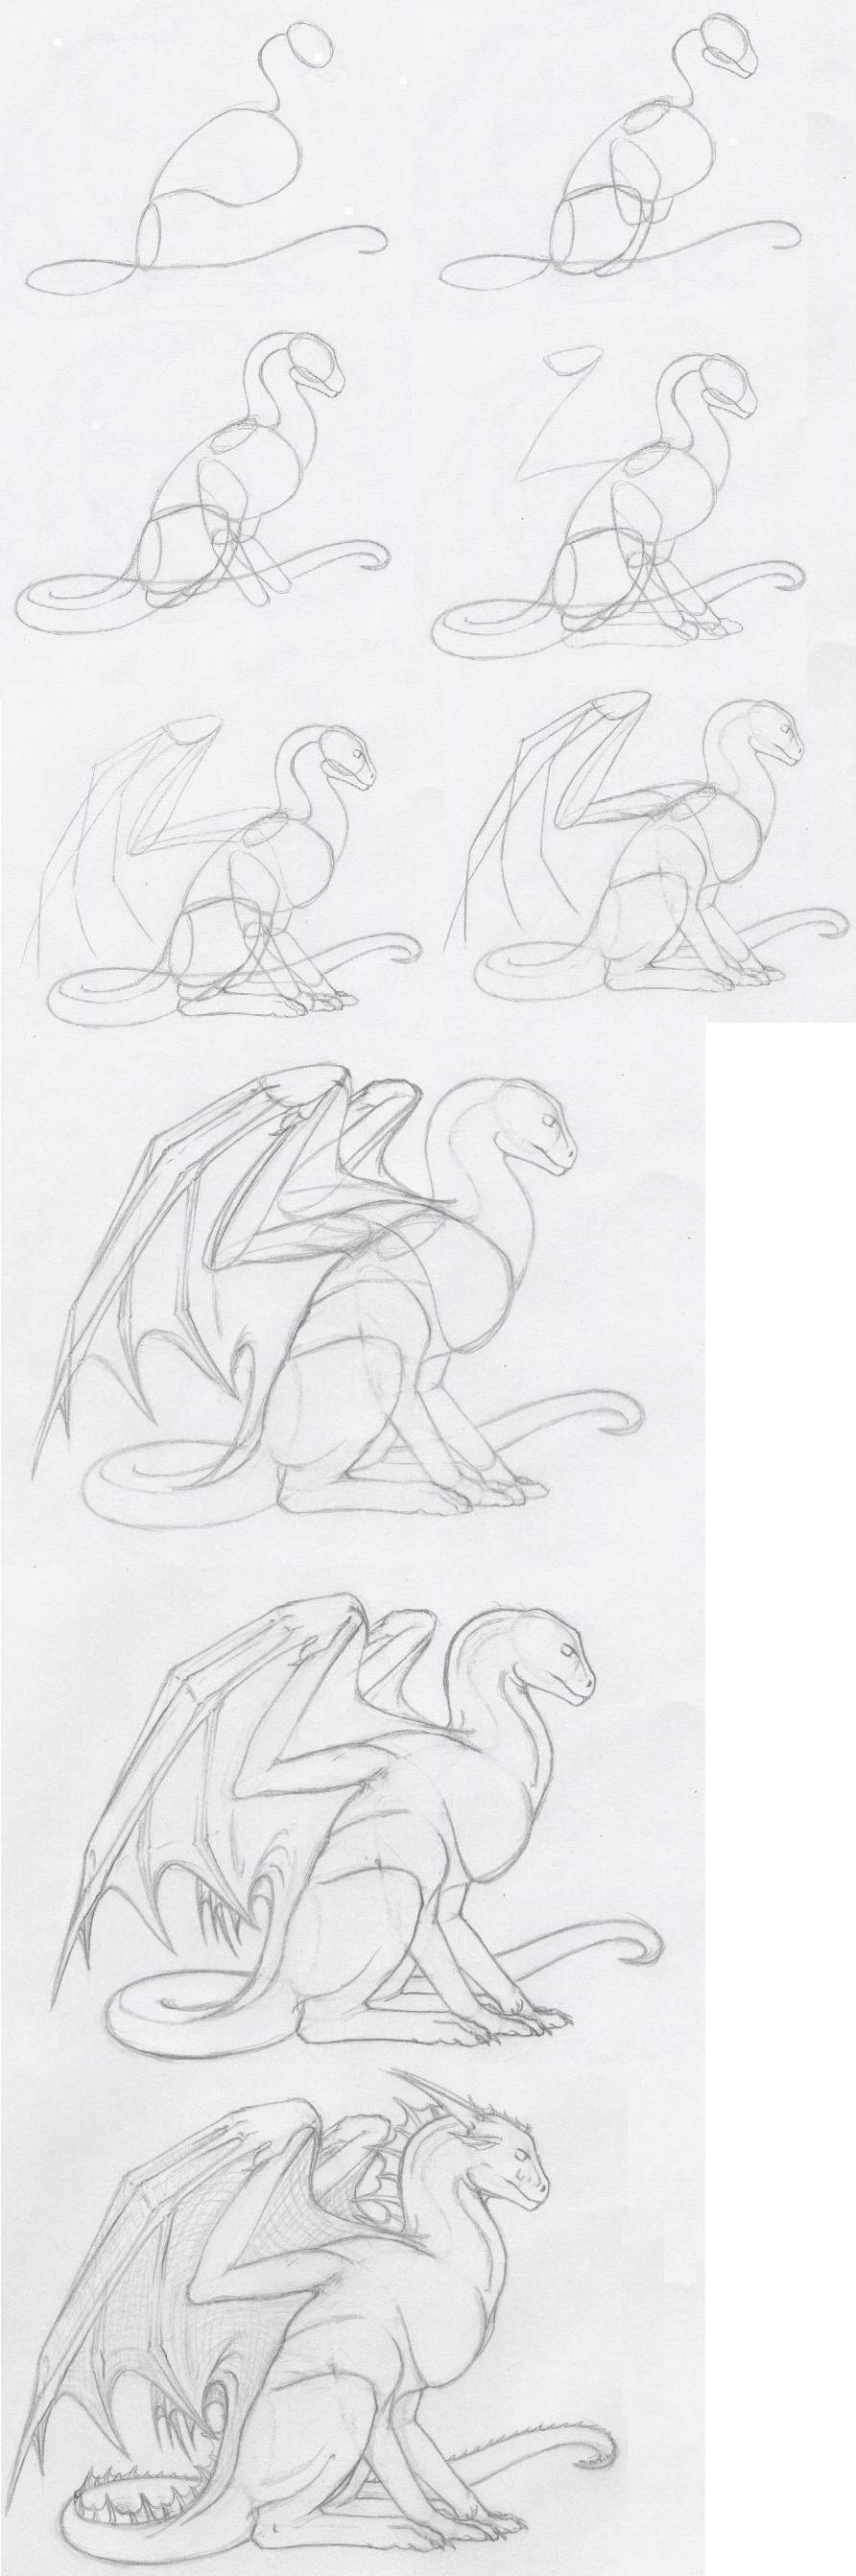
Fairly self explanatory. Drawings go left to right, top to bottom. If you can't see that ...well... yeah. *coughs*
step 1- You want to draw the very uber basics. A circle for where the head will go, then a line for the neck. At the neck endpoint you want to draw a bent teardrop shape for the chest, and an ocal not too far after for the hips. Then you continue the backbone line on down the tail.
Step 2- draw the basic shapes of the head, the thighs, the upper arms (leave enough room for chest muscles!!!) and an oval for the wing shoulder. If it is easier for you you can draw a guide line first for the arms and legs (like the wings in step 4).
Step 3- add the lower legs, arms, the neck and tail.
step 4- add all the feet, and a "v" for the wing arm, plus an oval for the hand.
step 5- add a vague outline of the chest muscles. These can help you determine the width of the arm. Then draw the vague shapes of the wing arm in, along with jointed "struts" for the fingers. Add the nose and eyes to give the dragon more of a personality, since this can often influence the final design.
step 6 - darken up the lines you're going to keep and erase all the support lines you don't need anymore. Try to smooth everyone over.
step 7 - draw the wingfinger bones (slightly bulbous ends with thinner middles) using the strut guidelines as the "top" of the fingers. Makes life easier. Then connect the finger ends to show the wing membrane. Don't forget to add the other wing like I almost did!
step 8 - lots more erasing of unecessary bits. Add in musculature details, and some folds in the wing to help add a touch of realism. Studying pictures of human and feline anatomy help a lot.
step 9 - Shade! Add remaining details! Trick to making the wings look "leathery" is crosshatching lightly and without lifting up your pencil. The across hatching (wingfinger to wingfinger) should mimic the curve of the sail at the finger tips, while lengthwise crosshatching parallels the wingfingers. doing so will quickly add depth to the wings.
Image size
892x2685px 212.27 KB
© 2004 - 2024 shiari
Comments33
Join the community to add your comment. Already a deviant? Log In
Thanks so much for this, it totally saved my xmas card this year! Great tutorial! Used it here: [link]